 |
 |
 |
 |
 |
 |
 |
 |
 |
 |
 |
 |
 |
 |
 |
 |
 |
 |
 |
 |
 |
 |
 |
 |
 |
 |
 |
 |
 |
 |
 |
 |
 |
 |
 |
 |
 |
 |
 |
 |
 |
 |
 |
 |
 |
 |
 |
 |
 |
 |
 |
 |
 |
 |
 |
 |
 |
 |
 |
 |
 |
 |
 |
 |
 |
 |
 |
 |
 |
 |
 |
 |
 |
 |
 |
 |
 |
 |
 |
 |
 |
 |
 |
 |
 |
 |
 |
 |
 |
|
|
Rebuilding the Lowrider |
|
|
|
Formerly "Lowrider's Owie" |
|
|
|
Created April 3,2003, updated and renamed on May 21, 2003, and brought up to date on Mar 27,,2004 |
|
|
|
(Note...If there hadn't been all the other diversions that came along in 2003, the car would have been finished on schedule, somewhere in late June of 2003 or so. But with the painter not being able to continue after taking it all apart, and then other real estate problems occuring in the late summer and fall, and then our move into the new house, followed closely by the need to landscape the back yard before the rainy season, the car just got left behind. It hopefully will be (and was) done by the end of March of 2004...it finally left home on 2/10 to get its electronics reinstalled. If I allocate a week per door, and another week for the back end, it should be done before spring progresses too far. It retires when I do, which is a year plus or minus a few months. Here's hoping.) |
|
|
|
They all have owies sooner or later. Lowrider's back half has had its share already. When it was 10 months old, it got hit in the rear on Thanksgiving Day of 1990, with my daughter and I driving on a crowded freeway, which was being widened, to pick up a relative for dinner. The hit was deceptive...just a small ding in the center of the taillight panel, where the Honda Civic submarined under it, bending it in the center. Buried under the bumper cover was $1500 worth of damage. A year or so later, it got popped at a stoplight, not hard, but there were a couple of dimples in the center of the bumper cover where the two bolts that hold license plates in place (on the other car) had gotten it. Then, it got hit really hard in New Mexico, where it was being driven for a while, and the entire rear end behind the back doors was swapped. That took 3 months to fix. They did a very good job.
Then, during the first week of April, 2003, it happened again. We were fighting off the flu in our house. I got rid of it, but Eva's version was lingering far past when it should have been gone. So her voice was affected, her nose was stuffed, and she coughed and coughed. Sleep was a fleeting dream. She was also burdened with making sure the changes we have made to our new house were being installed properly.
On Thursday, the 3rd of April, just before noon, we were convoying over to the new house to do some measuring for an appliance. From there, I was to depart for work. Unfortunately, along the way, we needed to stop for a busy intersection where the street converges from 2 lanes either way to just one. She was following me, and had plenty of room to stop. We were not rushing, and the weather was OK. About the time we were slowing down for the traffic, she had a coughing fit, and took her eyes off the road. After all these rear-enders I have had, plus the time the Boss almost got hit by a drunk driver back in the '70s, with those propane tanks in the back, I ALWAYS scan the mirror when I have to stop in traffic. I watched her approach, with no apparent loss of speed, and said, to no one in particular...."OK...here we go. You can stop now....Hello??.....BANG!!!!" |
|
|
|
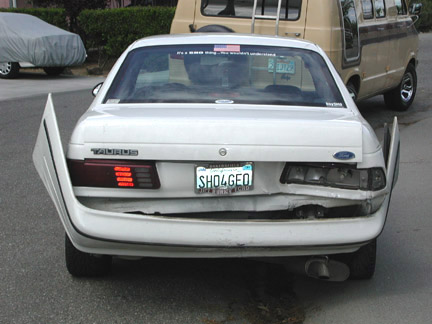
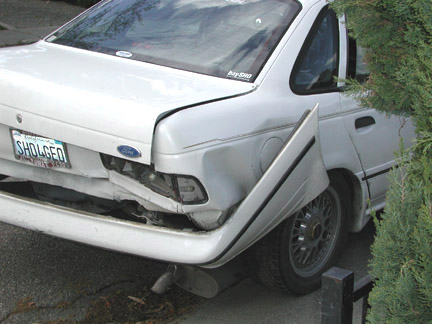
Other than the bumper being so skewed, it doesn't look that bad from the outside. However, inside the trunk (which still opens and shuts), the spare tire well is crushed, and the area behind the right wheel well is about one half the size it used to be. The CD changer is mounted on the left side, and the back-up battery was on the right. It survived, as its wood base was dislodged and lifted up as the fender collapsed. Had the other side been hit, the CD changer, being plastic, would have been in a million pieces, along with about 40 CDs. She picked the proper side to hit. |
|
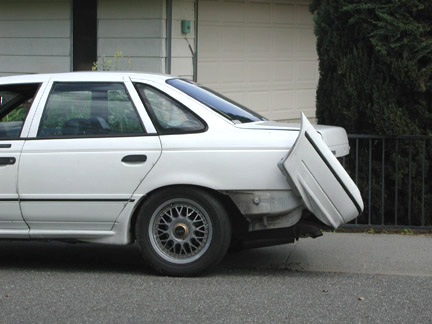 |
|
|
|
|
There are plenty of spare parts available to bolt on. The thing that worries me is how hard it will be to pull back the right rear fender and quarter panel. The taillight panel is easy to get from a recycle yard. The panel is pushed a very small fraction of an inch too close to the right rear door. The door functions OK. Ultimately, the shop bought the back half of a very young '91 LX. It is in perfect condition internally, with just a couple of small dents outside, with no cracked paint. The whole thing cost $250. |
|
|
|
|
|
|
|
|
 |
|
|
 |
|
|
|
|
|
|
These first pictures were taken after we got them both back home. (The RX picture was corrupted...I'll get another on Monday.) The accident occured a couple of miles from home, so we just limped home to regroup. No police were necessary, or were present. The Lexus will be fixed at the insurance company's recommended shop. We need to keep that part of the procedure simple, and get it dealt with quickly. Since the Lowrider is an easily totaled entity, more care will be required with regard to its estimate and repair. A BAYSho friend knows of a place in Sacramento where it has a much greater chance of getting a non-total estimate, and where the folks that are there can work with me to spread out the costs so that they won't appear to be so high. I'm confident after talking to my friend that it will be fixed properly, and will be ready in its new white pearl paint for its last convention in Madison.
Thanks to all of you for your condolences and good wishes.
More pictures and progress reports as they occur. |
|
|
|
Added to on April 7, 2003 |
|
|
|
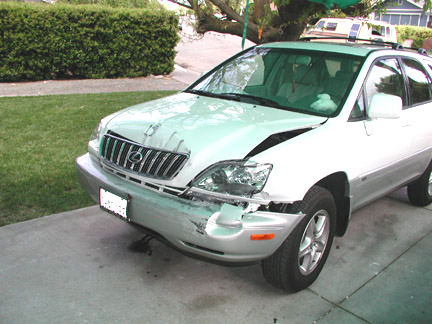
Here's the culprit, in all it's dented glory! Notice it leaking a little bit of coolant down under the right front fender. That apparently is just the overflow bottle, since it quit leaking almost immediately. However, it needs all the major parts in the front replaced...the condensor, radiator, and part of the radiator support, which apparently is in more than one piece. The noteworthy thing is the headlight. It costs 1200 bucks just by itself. High intensity or some such thing....it does have good night lighting. The bumper cover is only about $250....half what a SHO one would be. By the way, the rear bumper cover for the Lowrider is not damaged, just scuffed. The bracket is bad, but that is available....I can use the same cover again!!
But the cost breakdown for the two of them leaves the Lowrider the victor...if all parts were |
|
|
 |
|
|
|
|
|
|
available that it needs (rather than being obsolete, like 75% of them are), its total cost would be about (at the first shop, from where I took it today to the other one) $9000. When it was 18 months old, it got hit the same way, and that repair only cost $7500. Cost to fix the RX is 'only' $7400. I didn't see the breakdown, so I don't know how much the various parts are, and maybe that includes the pearl paint matching, but that's what the Lowrider's bottom line was. The cost for labor only at the first shop was $4200. The second shop knows what I am trying to do, and they say they will work with the insurance company to get it fixed the best way possible. But it will be fixed. For the other two cars, when they come on line, they'll have to be insured for stated value. I'm not going to fix them up like I want to and have them be worth low book if they get hurt later on. |
|
|
|
Added on May 12, 2003.....
Thanks to Efren Metcalf for hosting the mid-way progress pictures for me while I couldn't access the builder site site. Turns out my computer decided to change the URL for Yahoo just enough that I went to the wrong page to try to access it. After a phone call, everything's fine, and I know what to do to bypass that page. .....Anyway.....
I went to look at it a week ago today, and took the following pictures. It should be ready to drive home around the 15th of May |
|
|
|
MID WAY PROGRESS
as of May 7, 2003 |
|
|
|
 |
|
|
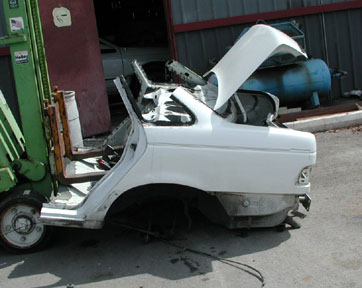
1. To the right is the old clip as it sits after being cut off the car. The secret to fitting clips to existing bodies is to cut them both at EXACTLY the same place in the roof pillars, so that they slide into place like they did on the assembly line. There is overlap along the floor, under the seat, but the rocker panels also need to be cut just so, allowing for a minimum of extra filling when the welding occurs. |
|
|
|
|
|
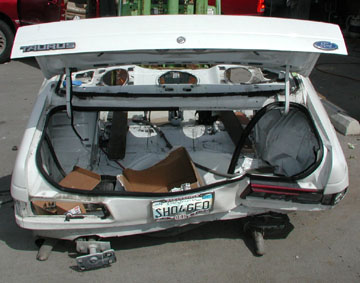
Below, you can see an excellent perspective of the damage. The bumper was below her bumper, and the body took the hardest hit. The plastic insert inside the bumper cover just snapped off, and let the bumper flop down and flip up, saving itself, but allowing the body to be severely damaged. |
|
|
|
|
|
|
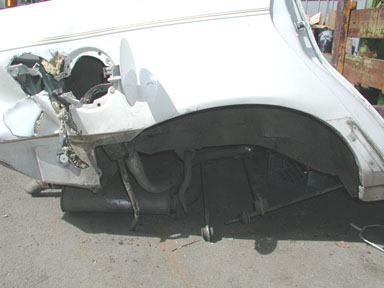
I'm not sure why there is such a big cut behind the gas filler door. There was no damage there, other than the collapsing of the body pressure was applied to it by the RX. |
|
|
|
|
|
 |
|
|
|
 |
|
|
|
|
|
 |
|
|
|
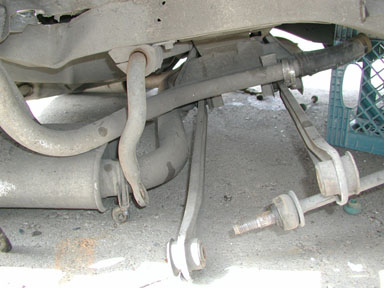
2. All usable parts will be taken from the remains of the old clip and stored, since there is no telling when something else will be needed. I'll need to make a place to store those relatively large parts, like bumpers, hoods, lighting splash panels, door interior panels, and whatever else. It might be a good idea to get a complete SLO (or SHO) rolling shell, devoid of any wiring or interior, just to have
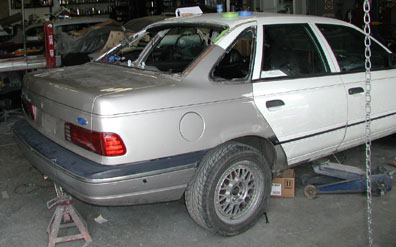
in case this happens again in the next 15 years, so that after the rest of them are all gone, I can fix another rear-ender. Don't tell Eva!!! (The parts plus doesn't count as a shell, since it is restorable, if there was ever a need.) The sway bar and the mufflers have been installed on the car since this picture was taken. |
|
|
|
|
|
 |
|
|
See how the new clip fits exactly in place, with a minimum of gap at the joints. It is held in place in this picture with 5 or 6 vise-grip clamping pliers, yet the rear doors shut with the same sound as they did before the car was hit. |
|
|
|
|
|
|
 |
|
|
|
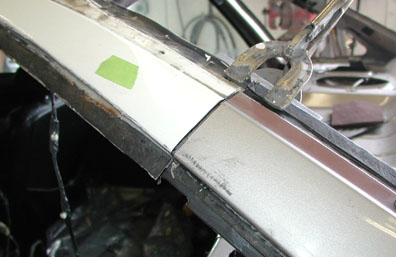
3. A closeup of the rear pillar shows the gap ready to be welded. There will be a patch inside the pillar that extends several inches either side of the gap. The car will therefore weigh a few pounds more than it did before, but be stronger in the vicinity of the joints than the original uncut pillars were. |
|
|
|
|
|
 |
|
|
|
|
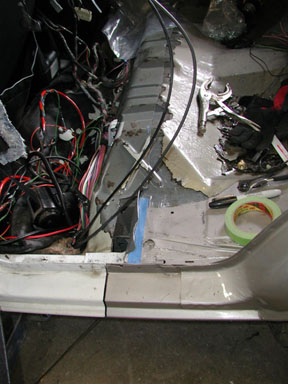
4. Notice the floor splice, right, which will be under the seat when everything is installed. There is about 2 inches of overlap in the floor, but the rocker panels are cut so they will be butt-welded with patches inside. Now's a GREAT time to replace the fuel pump...! |
|
|
|
|
|
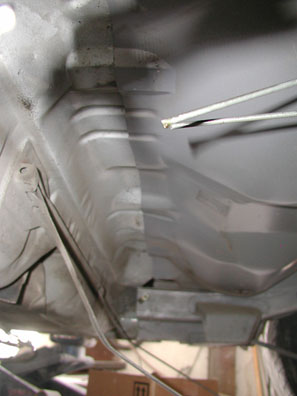
Underneath, the splice is easily visible where it goes across above the fuel tank location. You can see the less faded paint of the new clip on the right side...it is in VERY good condition. |
|
|
|
|
|
 |
|
|
|
|
|
|
It should be ready to go next week. It'll get aligned, then head to the stereo shop to have the electronics reinstalled, then it'll head back home to be painted. The rear glass will just be taped in, so that it can be painted with less masking. By the end of May, or first week of June, it ought to be ready for the road. |
|
|
|
|
|
Just got the word that the car will be ready the morning of Thursday, May 15. Unfortunately, other duties have overridden picking it up at that time. We'll go get it Monday. It needs to spend a few minutes in the muffler shop, to have hangars installed on the new rear chassis to support the SHO exhaust. After that, it heads for the paint shop, for a complete new white pearl paint job, then to Autohaus for reinstallation of the stereo system. Then, it's on the road again, to get used to the feel of the new rear end. Let's ROLL!!!! |
|
|
|
|
|
Total shop cost $3200. Parts $250
Labor $2500
Touch-up paint, various shop
matls, and disassembly of clip $450 |
|
|
|
|
|
Pictures of the repaint will be posted here. It should hit the paint shop 5/18 or so. |
|
|
|
Phase 2 |
|
|
|
Started May 19, 2003 |
|
|
|
 |
|
|
|
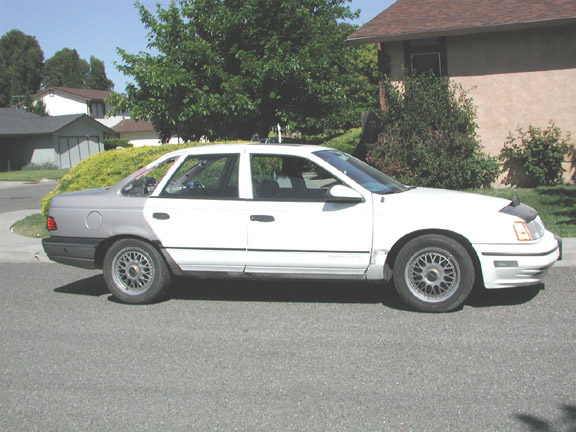
The day after it came home from Sacramento, Lowrider sits around the corner from the house, posing for its last two-tone picture. It rides very high in the back, as you can see, and is currently quite fast off the line, due to the lack of weight. It is now (5-24) at the paint shop, with all the windows out, doors apart, and lights and bumpers removed. I have a complete, undamaged, front bumper for it that I have been storing for a year or so, and that will go on now, so that it will be ready for permanent display after the 2004 convention in Vallejo.
Yes, the wheels are dirty....it was going to be washed the day it got hit. |
|
|
|
|
|
 |
|
|
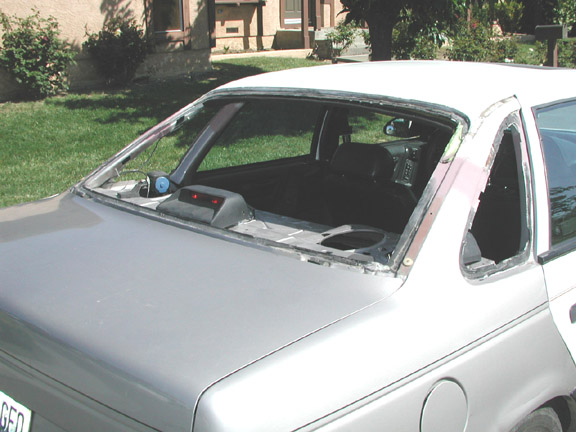
A shot of the rear quarter shows the windows out, and the package tray naked in all its glory. I am hauling the SHO plastic rear bumper to the shop at the same time, and it will be sticking out the rear window pointed up in the air....looks like something on its way to the wrecking yard... Not this time, though!!
The license plate is rather smacked up, so I'll have the DMV make up a new one. This plate will wind up on the Merlot Mica "Luxo-Barge", when that one is done, and this one is in the museum, with its original 'Jim Burke Ford' dealer fillers installed in place of the plates.
The stereo and all suspension upgrades will be removed and installed on other cars when this one retires....no point in letting all that equipment just sit and not be used. |
|
|
|
|
|
|
 |
|
|
|
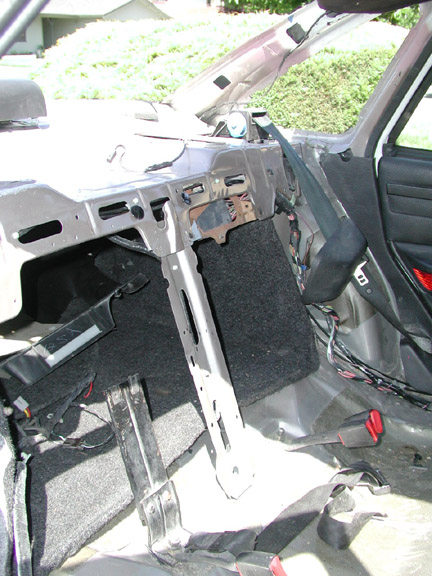
A shot through an open rear door shows the basic structure, without any seats or upholstery components adding weight. The keyless entry computer is the only component installed at this time, and the truck portion of that does not work.... probably not hooked up yet. It looks like I'm going to be the one to install all these parts....I didn't take it apart, so this ought to be an adventure. I do have a friend, one of my new neighbors at the new house, who used to install stereo systems as a line of work, and he says he'd be glad to help me put it back together. That will save a lot of money...the stereo shop wants about 4 hours or so to reinstall everything.
At least I have an example or two to use for reference.
The rest of the repainting will be documented on the continuation page, the link for which is at the bottom of this page.
Currently that page does not exist. It will in a week or two. |
|
|
|
|
|
Page 2 |
|


