 |
 |
 |
 |
 |
 |
 |
 |
 |
 |
 |
 |
 |
 |
 |
 |
 |
 |
 |
 |
 |
 |
 |
 |
 |
 |
 |
 |
 |
 |
 |
 |
 |
 |
 |
 |
 |
 |
 |
 |
 |
|
|
Valve Adjustment Adventure |
|
|
|
Started 11/14/02... |
|
|
|
To check the shims' clearance, tools required are the proper sizes of feeler gauges, the bucket compressor, a metal pick to disengage the shim from the bucket, and a small magnetic pick-up to remove the shim after it is lifted out of the bucket.
Joe showed me how he did it, using a sheet of paper to keep track of what valves are done and what ones are waiting. There are 24 of them, after all, and it isn't hard to lose track of what has been done, especially if there are lots of shims to change. First, we drew a diagram on the paper, basically showing each head and then each cylinder and its valves, separating the intakes from the exhausts. After laying out the feelers, as shown, we took a look at the cams, and decided which cylinder to start with. The cam needs to be pointing up, with its heel adjacent to the shim, in order to be checked. We picked the proper shim, depending on which it was, intake or exhaust, and measured all the valves we could find with the cam lobes pointing up. In this episode, only one exhaust shim needed to be changed, as it was .001 too loose. To measure the clearance, take the desired feeler, the one in the center of the range of allowable adjustment, and slide it under the base of the cam between it and the shim. If the feeler will go between the two parts with a moderate amount of effort, not too easy, but not needing to be forced, the clearance is considered to be the amount represented by that feeler. If it goes in very easy but still is not actually loose, the measurement might be considered to be that amount plus a half, for example a .012 feeler that is looser than moderately tight would be a .0125 measurement. If the range is .010 to .014, as it is for the exhaust valves, then anything within that range would be considered within specs. Someone power-tuning his engine might want all the valves to be exactly at a particular clearance for exact opening and closing times, but for normal street operation, the .004 inch range is satisfactory. |
|
|
|
Make a note of each valve's clearance that can be checked with the engine in the original position, then turn it around by using a ratchet and socket on the alternator nut. This is a handy place to rotate the engine. Watch as you begin to turn it to see which cam lobes will be coming up to the top, so you can check those valves. Make the adjustments the same way, and note the measurements on the sheet of paper. Continue this way until all the valves are done. The record kept on the paper will let you know which valves you have done, and will eliminate unnecessary repetition. |
|
|
|
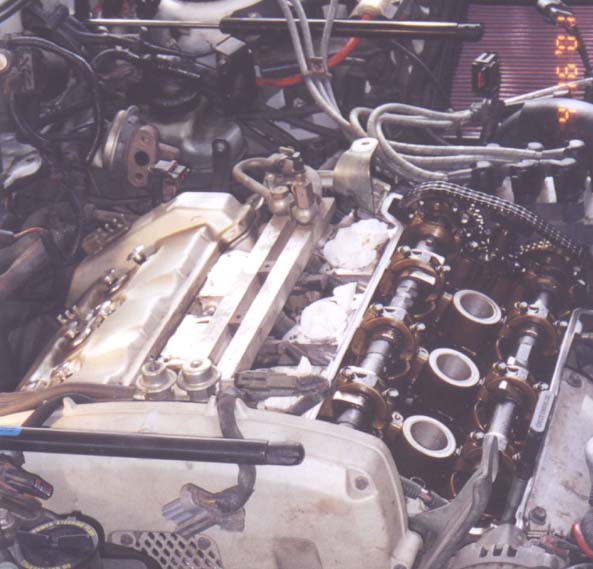
Take the Intake Manifold off, then you have this kind of access to the engine. |
|
|
|
 |
|
|
|
The intake comes off in two or three states, depending on how you want to count them. Disconnect all the vacuum and coolant hoses, then take off the perimiter fasteners, and finally remove the center bolts that connect it to the heads. Keep all the various fasteners in a plastic bag or two, and label the hoses if necessary to make sure they go back where they came from. Depending on your local climate, you might be able to block off the water hoses that go to the throttle body...they prevent icing of the throttle in the coldest climates. The EGR valve, visible in this picture, is fairly fragile as the cars get old...the tube can be cracked, so be careful with that, both in removal and installation.
When reconnecting the hoses and plugs, don't forget the solenoid for the vacuum control for the secondary butterflies, in the rear center of the engine. Your engine will run like a Mercedes 240D if you forget this connection. |
|
|
|
|
|
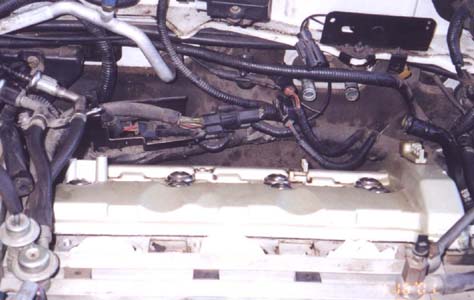
Removal of the Heater Core Hoses will REALLY help dealing with the rear Cam Cover |
|
|
|
 |
|
|
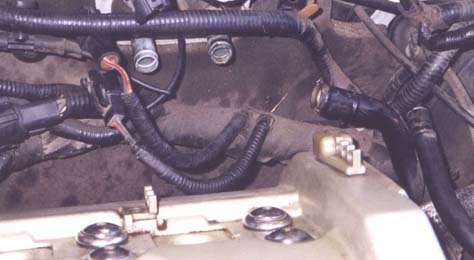
The front cam cover is very easy to work with. The rear cover is a lot harder, since there are many wire harnesses and fuel lines at the front end, and the heater hoses to the heater core are at the rear end. We discovered during reassembly of the Lowrider's covers that removing these two hoses will take about 90% of the hassle away from replacing the rear cover. With one hand (or a nylon zip tie) holding the fuel lines and engine power harnesses away from the engine, and the hoses removed, it took a matter of seconds to drop the cover down on the rear head. Removing the cover, with the hoses in place, took several minutes, most of which was spent determining how to orient the cover to lift it off without binding it on anything else. |
|
|
|
|
|
|
 |
|
|
|
It's also a good idea to replace these hoses and particularly the clamps, while you have such good access to them. The factory clamps are the vertical bolt types, and are extremely hard to remove while all the peices of the engine are installed. Worm drive clamps come off so much easier, especially if you remember to orient the screws upward so they can be reached easily. The hoses are very cheap and are readily available from any parts store. |
|
|
|
|
|
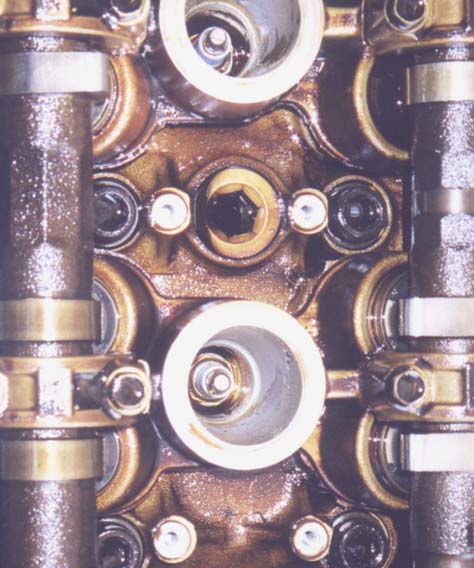
Vadim was SURE my cams were totally shot, since they had not been serviced for 201K miles. |
|
|
|
 |
|
|
Here's a close-up of the cams on the front head of the Lowrider. They look pretty good. The bronze caste to the metal of the head was due to the Castrol oil I always used in the engine. There was a little bit of oil in all the plug wells, and one or two of them were up to above the bottom edge of the spark plug boot. However, I had never had any misfiring problems at any time. |
|
|
|
|
|
|
Shims and feeler gauges as used to check and adjust valve lash |
|
|
|
 |
|
|
|
We've beaten to death the procedures to adjust the valves. Basically I used a sheet of paper, labeled with each cylinder, and room to annotate the clearance of each valve shim for that cylinder. They were measured, then changed if necessary. Only one needed to be changed, and it was .002 out of spec. The other 15 were either at spec or only .001 out of spec. The .002 valve was technically still in spec, but we changed it for the experience. Remember,this was after 201,000 miles of operation. |
|
|
|
|
|
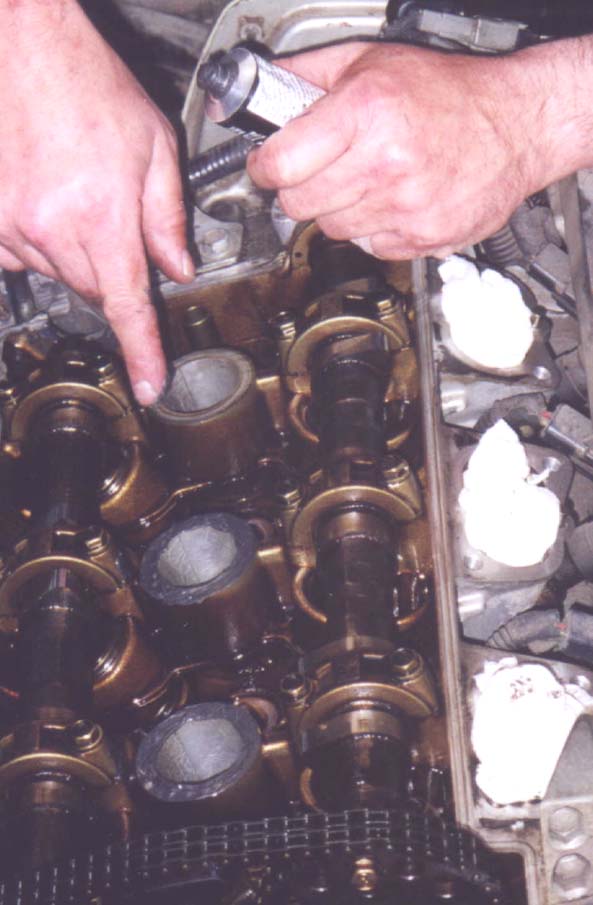
We resealed both sides of the original plug well seals, saving the new ones for later |
|
|
|
 |
|
|
The plug well seals tend to shrink over time, as they get hard from being heated and cooled every time the engine is run. Mine still were in good condition, and so we resealed them rather than replaced them. I haven't had any oil getting into my plug wells so far, and this was 50,000 miles ago, now.
We put the cam covers back on after all was done, and then the fun began. We had taken the hood off for more access to the rear head, and we figured that would make it easy to attach the rear manifold braces and the wiring harness bracket. Sorry about that...the bracket was very difficult to get fastened, and even with ratchet box wrenches, it is still mounted loosly, since I could not, and Joe could not, even with his much smaller hands than mine, get down there and get access to that lower nut. |
|
|
|
|


