 |
 |
 |
 |
 |
 |
 |
 |
 |
 |
 |
 |
 |
 |
 |
 |
 |
 |
 |
 |
 |
 |
 |
 |
 |
 |
 |
 |
 |
 |
 |
 |
 |
 |
 |
 |
 |
 |
 |
 |
 |
 |
 |
 |
 |
 |
 |
 |
 |
 |
 |
 |
 |
|
|
Rod Bearing Adventure |
|
|
|
More or Less Completed as of 11/14/2002 |
|
|
|
In the summer of 2001 I finally got around to replacing the rod bearings on the Lowrider. It had about 221,000 miles at that point, and the bearings were getting noisy. I was running Castrol 10-40 oil with a pint of STP included to keep a good film of lubricant up in the engine between starts. It still needed to be run every day, even if I wasn't going to use it, otherwise the noise from the rods was very intimidating until the pressure built up. I tend to skip gears when driving slow, in residential areas, and I'm sure I inadvertantly lugged the engine (as far as it was concerned. at least) by making it pull the car in 3rd or 4th gear below 1500 RPM. This habit no doubt caused the excessive bearing wear over time, and now I recommend to anyone who asks that the gear selected for slow speed running should be the same gear as the tens of mph being driven...that is, for 20 mph use 2nd gear, for 30 mph use 3rd gear, etc. This pattern keeps the engine at around 2000 rpm and should allow the higher oil pressure to prevent premature bearing wear. |
|
|
|
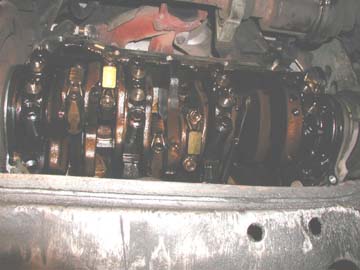
Crankcase view, with pan, oil pickup, and girdle removed |
|
|
|
 |
|
|
|
This is what the crankcase looks like after the pan, oil pump pickup, and girdle have been removed. The Y-pipe must come off first, and you need to be careful not to stretch or otherwise damage the wire harnesses to the oxygen sensors. I took them out of the y-pipe before I removed it, to make sure they did not get bent or broken while sliding the y-pipe around. The pan was not hard to remove...it is held in place by numerous bolts, and at each corner there is a stud in the block, with a nut holding the pan in place. These make it easy to realign the pan when reinstalling it. A nut is a lot easier to get started on a stud than a bolt into a hold that is hard to see with sealant all over the flange of the pan. There is a bit of wiggling the pan must endure to get it past the starter and the motor mounts, but rocking it side to side will get the job done. |
|
|
|
|
|
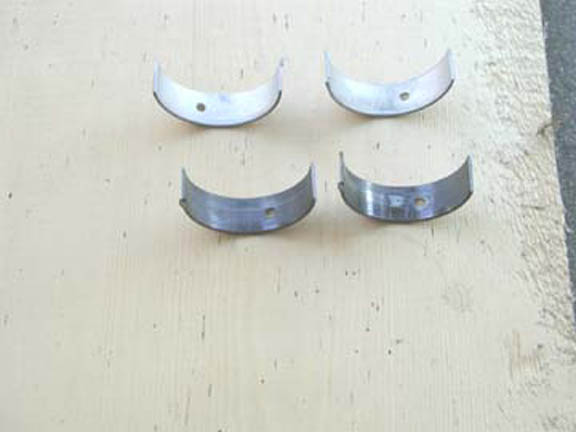
Old and New Bearing Shells |
|
|
|
 |
|
|
Here is a comparison of the old bearing shells with a new set to be installed. This was not the loudest knocking rod....there was just one upper bearing that showed a lot of copper, and one other one that showed just a small amount. I did check the clearance on several of the bearings after new shells were installed, to make sure the crank was OK. It was at standard size, more or less, at every journal I checked. And I did check the clearance at the most worn rod after its new shells were installed. |
|
|
|
|
|
|
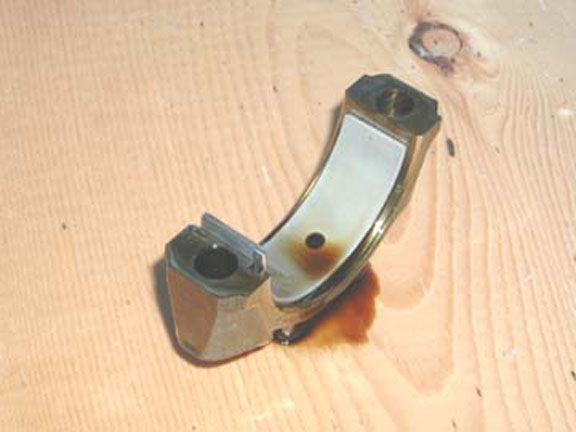
New Cap, ready to go on its new rod |
|
|
|
 |
|
|
|
Here is a new bearing shell installed in the rod cap. You can see the tang on the shell, ready to slide into the slot for it in the cap. There is a corresponding shell (identical) in the rod end, already in the engine. The hole in the bearing is for the oil to shoot up towards the bottom of the cylinder to assist in lubricating the piston skirt. The bearing goes into the rod end opposite the way it does here, so that the flat surface of the rod end will push the tanged end of this bearing shell down into position, and the far side of the cap will push the upper half of the bearing pair into position. The bearings stick up a thousandth of an inch or so from the tops of the cap and rod, so that they are shoved into position by the tightening of the nuts. This is called 'bearing crush', and insures they are tight against the rod halves, and cannot spin.. |
|
|
|
|
|
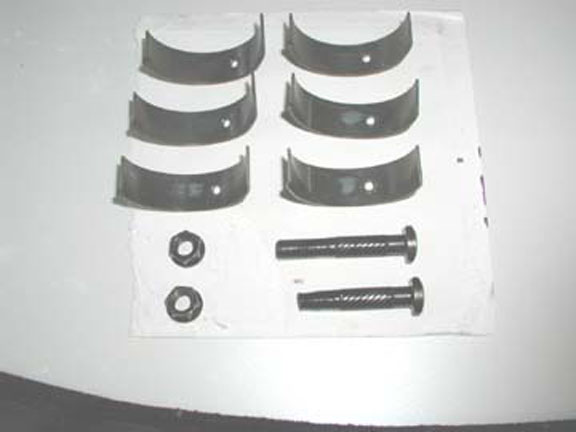
Oops.....I broke a rod bolt!! |
|
|
|
 |
|
|
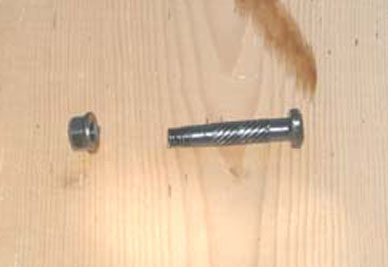
While tightening the first couple of rod nuts with my HUGE 150 pound capacity torque wrench, I discovered that it didn't feel right, and I didn't trust its accuracy. I have a Helms for my car, and the spec was around (it isn't in front of me now, so I don't remember...I'll update later) 26-28 pounds of torque. I had happened to leave this wrench set at 150 pounds from the last time I did an axle nut, and I found out here that this is the quickest way to ruin a click type torque wrench. Just before I found out the wrench was dead meat, I snapped off one of the rod bolts. It was the 6th one I had tightened, so I decided I had better replace all 6 of them. I ordered 12 bolts, but just used 6, and went to Sears and got two arm type torque wrenches, big and little. Some folks don't like that type, but they have served me well over the years doing countless rebuilds of the Boss. |
|
|
|
|
|
|
 |
|
|
|
Here's a closeup of the broken bolt. The wrench felt funny...didn't seem to be tightening up, so I figured I'd just go for it, since it was all I had to torque the bolts. It snapped off just at the cap, and the broken part of the bolt screwed out of the nut easily. The new bolts came with nuts, so I have all good parts in the engine. It now has been 18 months since the work was done, and there have been absolutely no problems with the engine at all. |
|
|
|
|
|
Inserting the New Bolt into the Rod |
|
|
|
 |
|
|
|
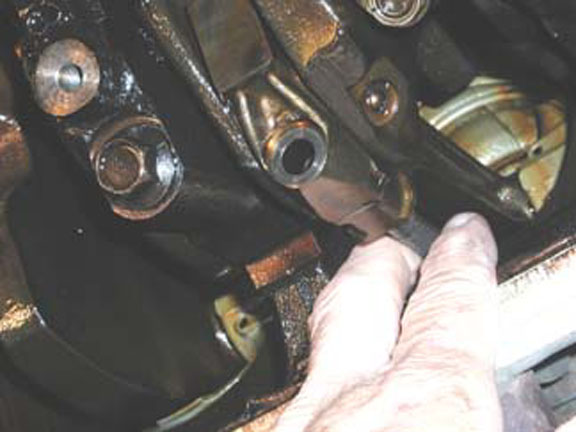
This shot is of me inserting the new bolt into the rod where the broken one was removed. It will go in just fine, but must be drawn in with a wrench due to the flutes on the bolts, which are intended to keep them from spinning in the rods when the nuts are tightened. I had to tap the broken bolt out with a punch, then draw the new one in with a little jig I made from a piece of aluminum dowel. I needed to use something softer than the metal of the crankshaft, just in case the dowel touched the crank...we don't want to scratch anything. If the rod were on the bench, there would be no problem, but since it is in the engine, and there is no way to get a tool of any kind to the top of the bolt when it is installed, it needed to be drawn in from the bottom. Also, it would need to be torqued to spec at least twice, to make sure it was fully bottomed in the rod. Otherwise, the nut would soon work loose and cause major problems. |
|
|
|
|
|
 |
|
|
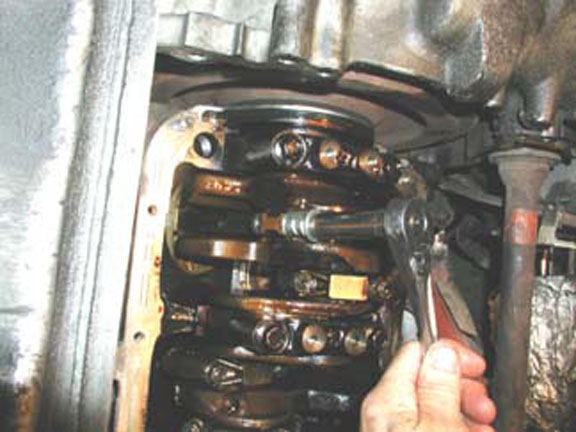
Here I'm drawing the bolt down into the rod with an aluminum collar I made from a piece of dowel. These pictures were taken from the old website, and enlarged a bit for this faster loading site. That makes them a bit fuzzy, and for that I apologize. |
|
|
|
|
|
|
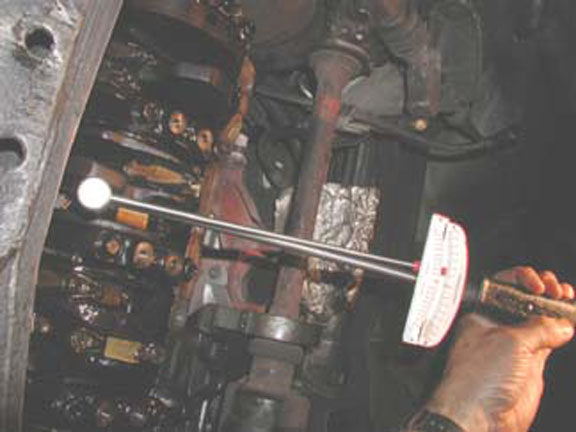
The last step was to tighten the nuts to the proper torque |
|
|
|
 |
|
|
|
After the debacle with the click type torque wrench, I went out and bought this small one for more precise jobs, and a bigger one for doing main caps and axle nuts. I used to have one like this that I loaned to someone, and then they moved away....you all know that story. So anyway, I got the hard stuff done before I had to palm off the rest of the job for friends to finish. |
|
|
|
|
|
After doing the bearings, I ran into a bit of a problem... |
|
|
|
As most of you know, I ran into a problem near the end of this project. As I was cleaning up the pan getting it ready to go back on the car, I suddenly had a shooting pain in my right hand and forearm. There was no explanation for this pain, but it was very severe, and caused me to stop working on the car and go to the hospital to get a pain shot. The needle used to give me the injection turned out to be infected, and after watching the infection spread for a day, I went back, was admitted, and wound up spending 12 days in the hospital. The first half of the stay was a comedy of errors, which resulted in two infections seriously injuring my hand and spreading up my arm towards my shoulder. It took 5 days for the inner arm infection to be stopped, and 3 days for them to actually start giving me antibiotics to reduce the swelling in my hand. During that time, it was cooking like a Christmas turkey, and when all the parts were counted at the end, I had one less functioning finger. My right ring finger is fixed in a shake-hand type bend, and will never flex again. At the time I was released, I barely had use of my right hand. Now, a year and a half later, I have recovered some of the use of it, but I cannot play the piano any more, and I had to relearn to write and type. I can't hold a torque wrench tight enough to do high torque fasteners, but I have learned to adapt. They can't keep me down. As of spring of 2004, the only untested function of my hand is to play the piano. The finger is in the right position for white keys, but black ones might be a problem. Oh well....there's always the guitar.
In the spring of 2003, I contacted an attorney that had already been successful with litigation against Kaiser. He said that this would be a piece of cake. The bad news is that California law limits damage awards from HMOs to $250,000. That law was passed in 1967, when that was a lot of money. Unfortunately, it has not been updated for inflation, despite the attempts of many groups with fairness to the populace as their goal. HMOs and their attorneys are very powerful in Sacramento. So I got that much, minus about 1/3 of it for my attorney....a computed standard amount, to preclude gouging by less upstanding folks. The Lexus GS 300 in my garage, and some other investments, are the result of that lawsuit. I'd rather have my finger back, but it could have been worse.
Back to the finish of the adventure......I invited a couple of friends, Alan Fanning and Marcus Smith, to come over and help me finish the car, which had been up in the air in the driveway all the time I was in the hospital. When I got home there was a 'what is this junker doing here?' note on it from the city saying I had one day to move it or it was going to the junkyard. I called up the local gendarmes and basically told them to keep their hand off it. The note said that once it was towed away there was no getting it back, even if I saw it being towed and followed it.....that would have been an interesting encounter.....! So, my friends rechecked my torqued rod nuts, put the rest of it together, and we fired it up. They left the wrench on the damper bolt, which had been used to rotate the engine....and when the engine first rotated, with the DIS disconnected, and fuel inertia switch tapped, it flew off with a huge bang. I was cranking it, and I about leaped through the closed moonroof. We laughed about it afterward, while we retorqued the loosened damper bolt. Then after 20 seconds of cranking, it developed oil pressure. We connected everything and cranked it right up. It was and is as quiet as a mouse, if you disregard the noisy cam chain tensioners.
I probably won't need to do rod bearings again....now that I'll have two cars to carry the load, and won't have so much daily driving to do. And....the Lowrider replacement, Black Diamond, has an 80K engine with brand new bearings. It's set for the millennium.
Ahhhh.......Retirement......!!!
|
|


